The storm has passed. The skies are clear. But your roof?
It might be holding onto damage that could cost you thousands if you don’t act fast.
Whether you’ve got missing shingles, visible leaks, or just a gut feeling something’s wrong, this guide will walk you through exactly what to do after a storm hits — so you can prevent bigger problems and protect your insurance claim.
Step 1: Make Sure It’s Safe to Inspect
Before stepping outside, take a moment to:
- Check for downed power lines
- Avoid standing water near your home’s foundation
- Wait for lightning and high winds to fully stop
Your safety comes first.
Once it’s safe, walk the perimeter of your home. Look for:
- Shingles on the ground
- Dented gutters or metal flashing
- Loose siding or trim
- Branches or debris on the roof
Don’t climb on the roof yourself — especially if it’s wet or unstable.
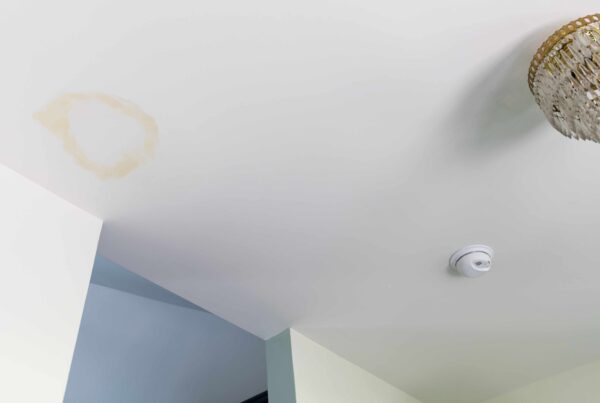
Step 2: Check for Interior Signs of Damage
Storms can open up your roof in ways you won’t see from the street. Check inside your home for:
- Water stains on ceilings
- Bubbling or peeling paint
- Drips in attic or upper floors
- Musty odors
Even if the roof looks intact, the underside might be compromised — and moisture could already be making its way inside.
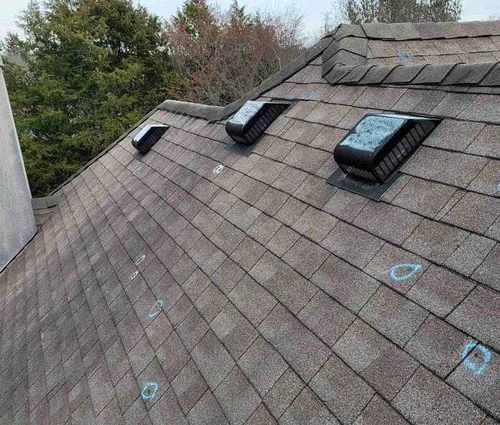
Step 3: Call a Roofer — Before You Call Insurance
Here’s a common (and costly) mistake:
Homeowner calls insurance first… gets denied or underpaid because damage wasn’t documented properly.
Instead, call a roofing contractor who specializes in storm damage immediately after a storm.
A good roofer will:
- Perform a same-day inspection
- Document every area of damage (with photos and chalk)
- Identify whether the damage qualifies for a claim
- Help you decide if it’s better to file or wait
This protects your claim, your home, and your peace of mind.
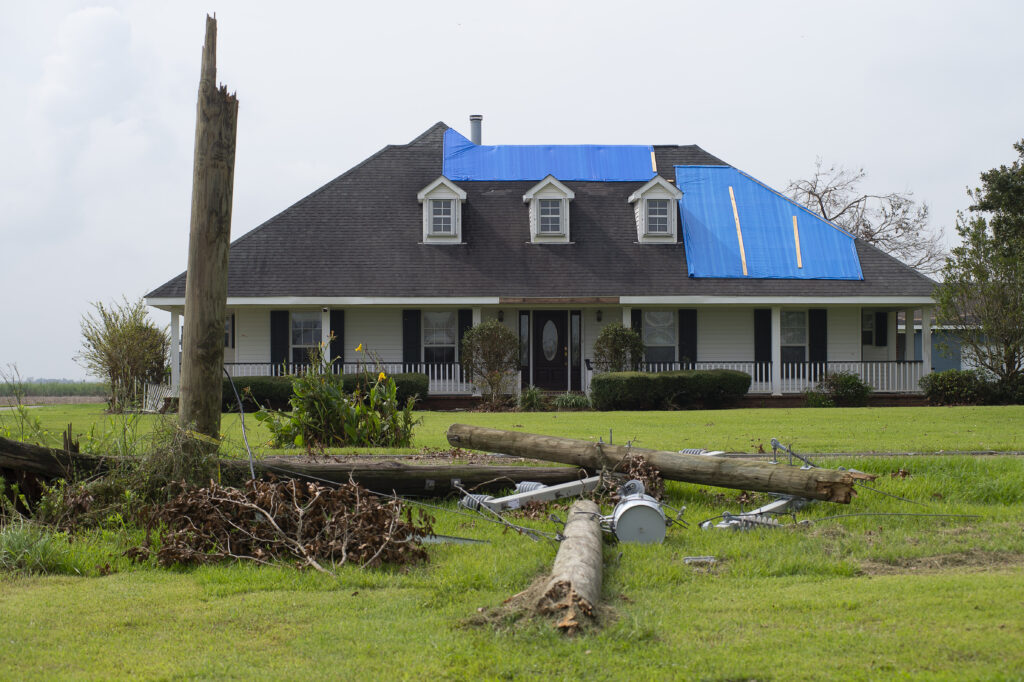
Step 4: Temporary Fixes to Prevent More Damage
If your roof is leaking or exposed, temporary protection can prevent things from getting worse while you wait for the adjuster or repairs.
Common emergency fixes include:
- Tarping the roof to cover open areas
- Sealing around vents or flashing with roofing cement
- Clearing debris to prevent water buildup or pooling
- Removing wet insulation from the attic to avoid mold
Pro tip: Take photos before and after applying any temporary fixes — this can help support your insurance claim.
Step 5: Document EVERYTHING
You only get one shot to prove your roof was damaged by this specific storm.
Make sure you:
- Take wide and close-up photos of the roof and property
- Keep receipts for emergency supplies or tarp services
- Get a storm report from your roofer or weather tracking site
- Record the date and time damage was discovered
This isn’t just good practice — it’s protection against a denied or reduced claim later.
Step 6: File the Claim (When You’re Ready)
Once your roofer confirms the damage qualifies for a claim, it’s time to call your carrier and open a claim.
Have ready:
- Date of the storm
- Your policy number
- Description of the damage
- Roofer’s report (if available)
Then, let your contractor know when the adjuster is coming — they should be there too.
Final Word: Time Is Not on Your Side
Storm damage worsens with time.
Water gets in. Mold grows. Shingles loosen. And before you know it, what could’ve been covered becomes your out-of-pocket problem.
Don’t wait.
Call Alfa Y Omega Construction for a same-day emergency roof inspection.
We’ll protect your home, secure your roof, and help you take the right steps — fast.
Because the storm may be over…
But the damage is just getting started.

Slade is the Sales Manager at Alfa Y Omega Construction and brings over 24 years of hands-on experience in the construction industry. He’s passionate about helping homeowners navigate the often confusing process of roof replacement and storm-related insurance claims. With a background rooted in both fieldwork and customer service, Slade ensures every client is informed, protected, and treated with integrity. Whether it’s identifying hidden damage or guiding you through a complex claim, his goal is to simplify the process and deliver results. When you work with Alfa Y Omega, you get a team that fights for your home like it’s their own.